Summer Memory Quilt Project

My father was diagnosed with Alzheimer’s two years ago. He is now in a Southport EMI care home and has settled in well. He still knows me and I visit often when I’m here. Even though we are keeping his flat, I thought it was time I cleared out some of the stuff he’d been hoarding for ever.

In amongst the bedding I came across some old sheets that I remembered having on my bed as I child.
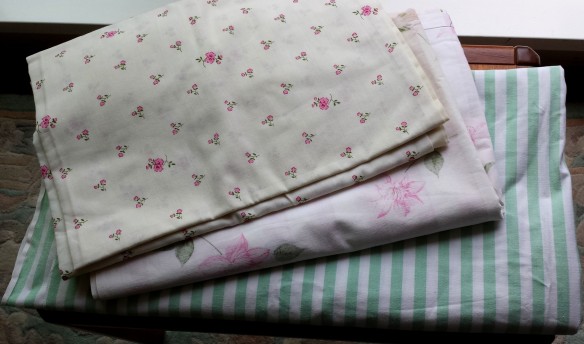
old cotton SheetsThey were threadbare in the middles and a bit yellowed in places but the edges were still pretty good. So I decided to make a summer memory quilt that will remind me of my childhood every time I come to Southport.

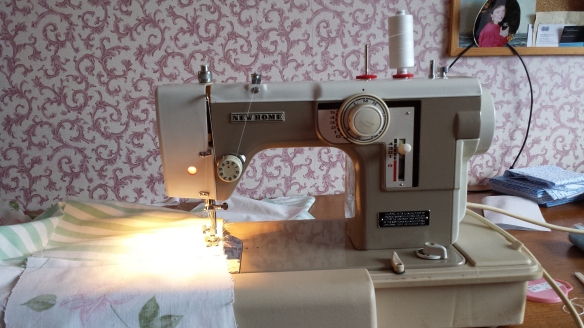
First I needed a sewing machine as mine was back in Southampton.

20140609_192814


I thought something elderly was quite fitting for the fifty-year old fabrics I was using.

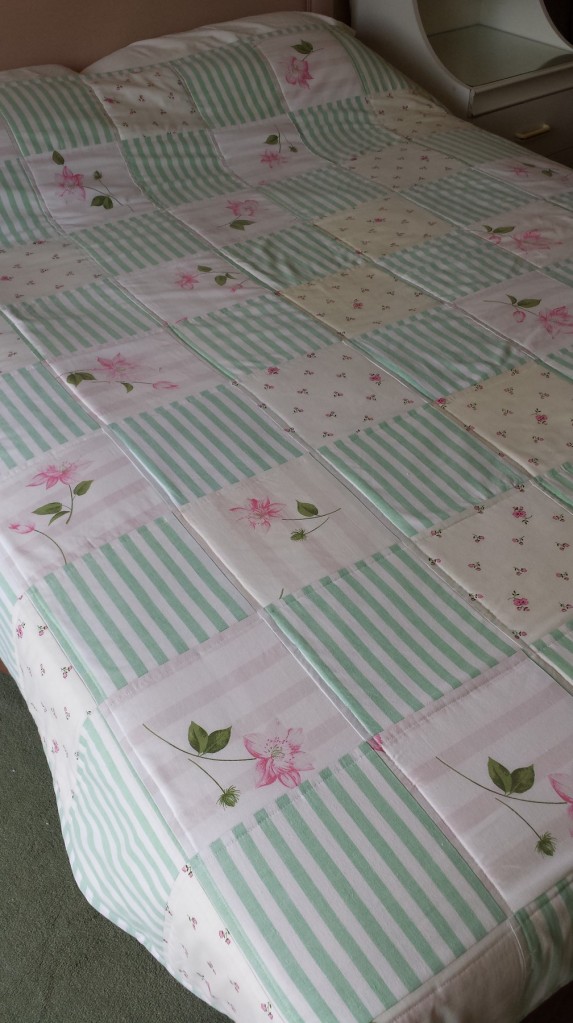
Summer memory quilt

So here’s how I did it.

Instructions

The quilt measures 70″ x 76″, which fits a standard 4’6″ double with a 10″ overhang on the sides and bottom.

For this I needed 90 x 8 1/2″ squares made up of

  • 45 x green stripe
  • 23 x sprigged fabric
  • 23 rose-print (fussy cut so I had a rose in each square)

You will also need 4 metres of cotton batting or curtain interlining (much cheaper!) and a white sheet for the backing.

  1. Join the squares in rows of nine alternating the green stripe with the floral as shown in the photograph. Ensure four of the rows rows finish with a floral square at each end and the remaining five have a green stripe square at each end.
  2. Lay your rows out in quilt formation until you are happy with the arrangement.
  3. Press all the seam allowances of row 1 to the left, those of row 2 to the right, row 3 to the left and so on until all rows are pressed.
  4. Join all the rows together, slotting the seams together at the little step (produced by pressing the seams in different directions). This is your quilt top.
  5. Press these joining seams open.
  6. Press the quilt top on the right side, ensuring that you don’t dislodge any of the seam allowances on the wrong side.
  7. Press and lay the backing sheet on the floor.
  8. Cut the batting or interlining to size, joining by butting the edges together and using a loose hand stitch. Lay this on top of the backing.
  9. Lay the quilt top, face up, on top.
  10. I quilted my piece, using a walking foot, 1/2″ in from each long vertical and horizontal seam but any quilting you choose will be fine. Or, if you don’t want the struggle of getting the rolled up quilt through your machine, use buttons!
  11. For the binding cut 4 x 4″ strips, 80″ long, from the green striped fabric. To avoid the risk of the binding looking a bit skewed, if it wasn’t quite square, I cut the binding with the stripes going across the strip instead of down.
  12. Fold each strip in half widthways and press.
  13. Pin one strip to one of the outer edges of the quilt, lining the raw edges up with the raw edges of the squares. Stitch 1/2″ from the edge. Trim all the excess backing and batting off flush with the raw edges of the squares.
  14. Pin and stitch a second strip to the opposite edge.
  15. Now flip the binding over and press. Fold under so it touches the stitching you joined it with. Press and pin.
  16. Attach the other two strips, leaving a 2″ overhang at each end. Flip over the binding and press. Turn in the overhang then fold under, press and pin.
  17. I machined round my binding, 1/8″ from where it joins the quilt, but it was tough stitching over the corners. Hand stitching will give it a softer finish.
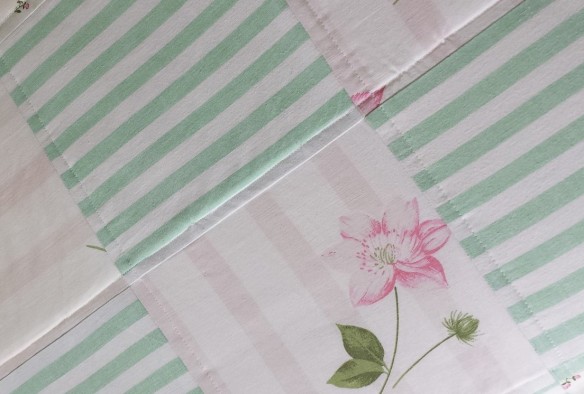
Summer memory quildetail2I really enjoyed making this quilt. There’s a lot of sheets left over and next time I might add some old photos printed onto fabric.

 

Give Cushions a Chance

I’m halfway through Book 5 of my ‘How to…’ series of craft books. The working title is ‘How to Design and Make Fabulous Cushions’ although that may change, as they usually do..

But, believe it or not, this blog post isn’t a sales pitch, it’s about my thoughts and sympathies for the humble cushion.

Cushions don’t even get a bad press. They’re more or less ignored. Lined up by the hundreds in department stores, dumped in trolleys and baskets, taken home, placed artfully on the matching sofa and never really noticed again – until it’s time to change the colour scheme.

As I’ve been writing, I’ve begun to realise that cushions don’t have to be dull, boring and unnoticed. They can be used for more than slouching, sleeping and receiving dribble. They can be fun, interesting, educational, inspirational and informative.

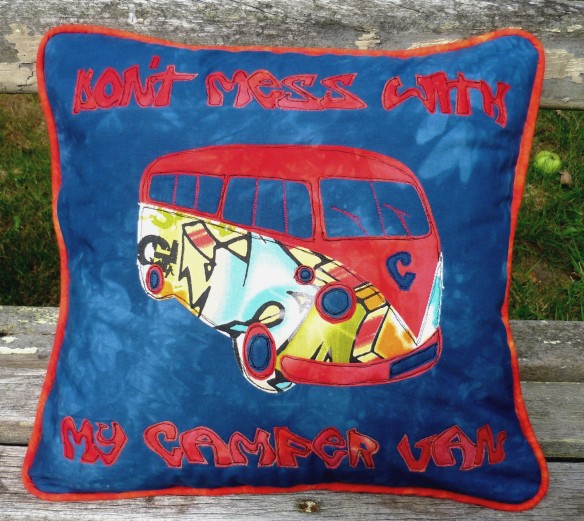
They can convey your feelings about your favourite possessions…

'Don't Mess With My Camper'

‘Don’t Mess With My Camper’

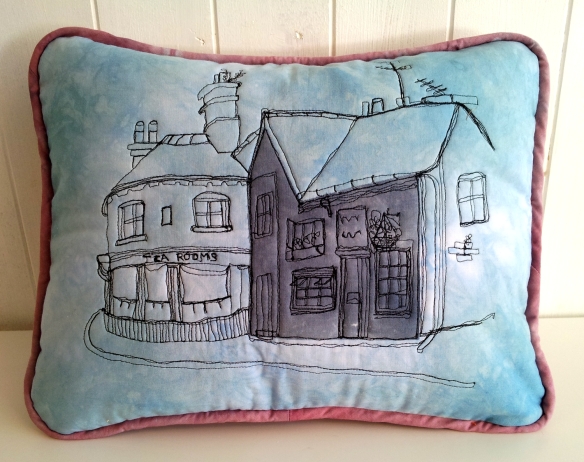
They can remind you of a favourite place…

My Favourite Tea Shop

My Favourite Tea Shop

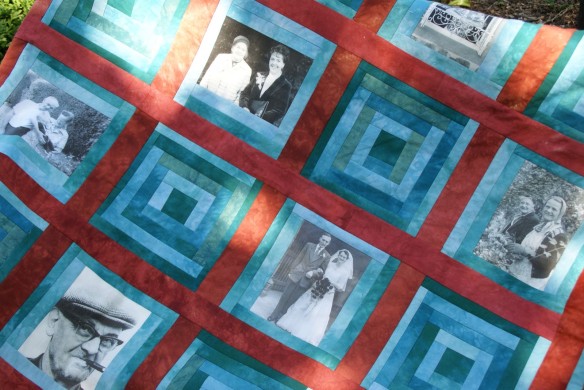
They can remind you of those that are no longer with you…

A family photo quilt

A family photo quilt

They can remind you of your holidays…

What I Did on My Holidays

What I Did on My Holidays

They can remind you of where you used to live…

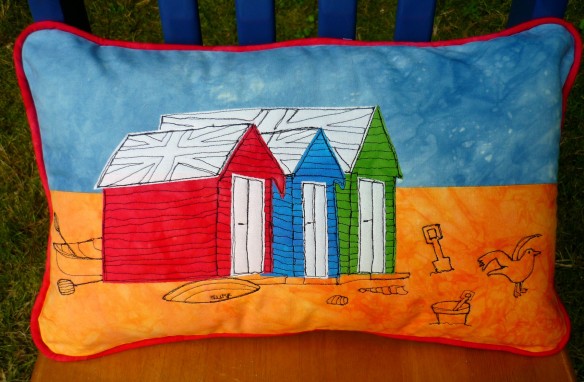
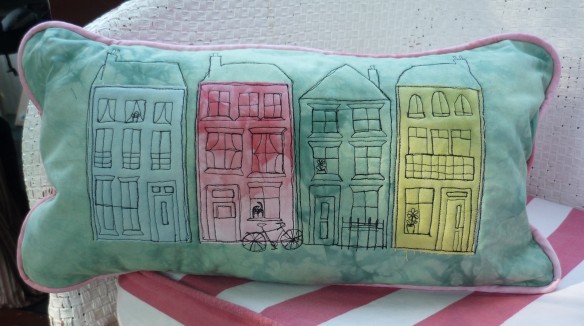
My Childhood Home

My Childhood Home

But cushions can also be an education aid for children and those with disabilities. At the Industrial Museum where I volunteer, we regularly have visits from groups of deaf/mute children and their carers. Children like this only have touch as a means of communication and, as I was told by several of their carers, tactile cushions and soft toys are an invaluable education aid.

So as I work through my book, I will be rethinking the role of the cushion and its place in modern living. If you have any ideas or thoughts on how cushions could take a more active role in our lives, I’d love to hear them.

All my craft books are available on Amazon in eBook format, and, by the end of this week, in print format. You can find details of these and get lots of free sewing tips and videos on my website at  http://www.time4me-workshops.co.uk/

How to Dye Your Own Fabrics – Dyes and Chemicals

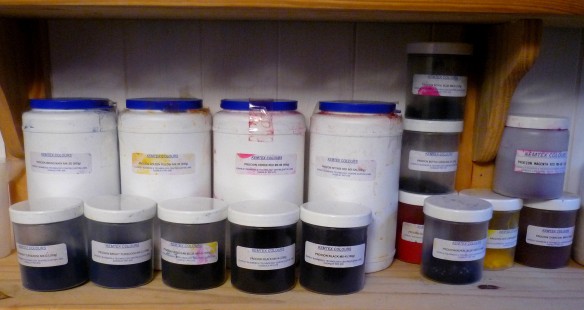
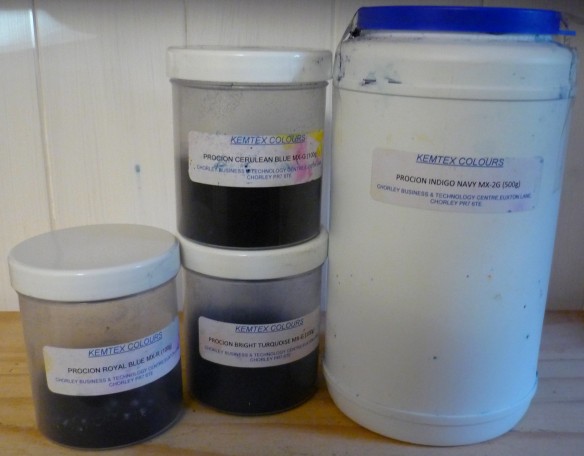
When I dye my own fabrics, I use Procion MX dyes, which I find really easy to use. If you’ve never dyed before, here’s some info on the dyes and chemicals you’ll need to get started.

The Dyes

Procion MX fibre reactive dyes are synthetic dyes that are intended for use with natural plant-based or cellulose fibres. They are easy to use, easy to mix and provided a range of light-fast, clear bright colours. They are available from suppliers around the world and come in a range of great colours.

dye close up

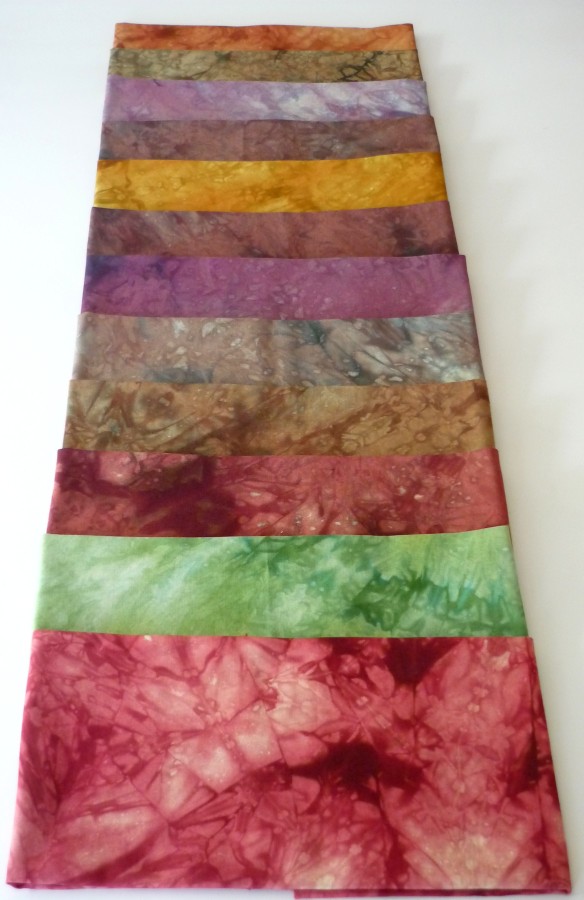
The best thing about them though, in my opinion, is that with just three primary colours – red yellow and blue (and black!) you can make a whole range of beautiful shades. Of course, these primaries also come in various forms. Those that are not mixed with other colours will produce the purest shades.

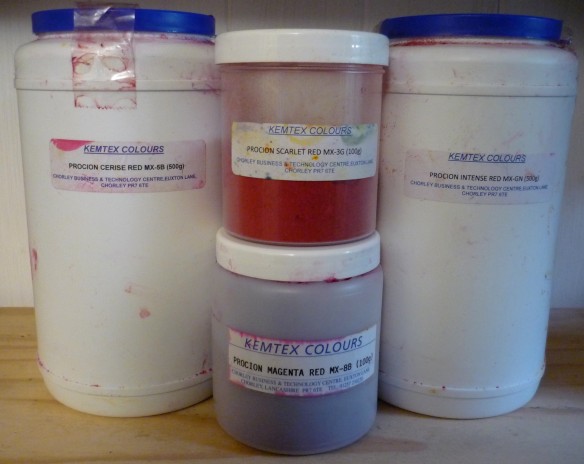
Red can be cerise, intense red, scarlet and magenta

Red can be cerise, intense red, scarlet and magenta

Blue can be royal, navy, cobalt and cerulean

Blue can be royal, navy, cobalt and cerulean

Yellow can be acid, golden and marigold

Yellow can be acid, golden and marigold

So by just sticking to these three primaries, in their particular variations, you will never run out of new combinations to discover!

Varying Primary Colours

Varying Primary Colours

Letters and Number s of Procion MX Dyes

When you go to your dye supplier to purchase your first selection of dyes, you will be faced with a dizzying array of letters and numbers which signify the properties of each dye. Each dye name usually comprises:

  • The brand name – Procion for example.
  • A colour name – Golden yellow or Cerulean Blue
  • A prefix which signifies the type of dye – MX stands for Dichloritriazine
  • A dash.
  • An optional number – indicates how much more of a colour is in a dye. For example 8B is bluer than 5B.
  • A letter, usually, G, R or B. These signify the following German colour names:

o    Gelb for Yellow

o    Rot for Red

o    Blau for Blue

Sometimes a dye may just have a letter after the dash rather than a number and a letter. Examples of these are Blue MX-R, which, by virtue of the red component, may have a purplish cast and Blue MX-G which, by virtue of the yellow may appear slightly green.

If you intend to purchase all your dyes from the same supplier, you will soon get to recognize the various colour names which are associated with the various codes and will be able to order by name. If you buy from various suppliers, you may find that different suppliers call dyes of a particular code by a different colour name than your previous supplier. In this case, it is better to order those dyes you require by code rather than name to ensure you get the colour you are expecting.

Chemicals

There are a wide range of chemicals on the market which can be used in dyeing. I only use two, Synthrapol, a strong detergent, and Soda Ash, a dye fixative. Many home dyers also use urea in their work. This is a wetting agent which can help your fabric absorb more dye and it can be useful in very dry climates. As I live in the UK, with its constantly changing climate and plentiful rainfall, I have never had any need of urea.

Synthrapol

Synthrapol is a strong, non-alkaline detergent which is readily available from dye suppliers. It is very useful for washing fabric that is not PFD(Prepared for Dyeing and Printing) as it will remove any sizing or other treatments that the fabric may have been subjected to. It is also incredibly useful for washing your fabric after dyeing and rinsing as it gets rid of any loose dye particles which have not bonded with the fibres. This will prevent bleeding in the future and boost colour-fastness.

Soda Ash

Soda Ash is used as a dye fixative in that it helps the dye molecules permanently bond to the fibres during the curing (or batching) process. It is available from dye suppliers and I had been buying it for some years, at considerable expense, in 5KG tubs, until my kindly dye advisor told me that I could use washing soda instead. It is just as effective, available at my local supermarket, and considerably cheaper.

This post is an excerpt from my new eBook ‘How to Dye Your Own Fabric’. If you’d like to get the book for yourself I’ve given you the link below:

How To Dye Your Own Fabrics – Why I Dye

Why Do I Dye?

I have been teaching machine sewing for over twelve years and have been dyeing my own fabrics for most of that time, both for my students and for my own creations.

Margo_bookshelflarge-200

My nearest, decent, fabric shop is an hour’s train ride away. They sell a wide selection of plain and printed fabrics in most of the well-known ranges, but often I cannot find exactly what I want. This is no reflection on the shop, but since I have discovered fabric dyeing, shop-bought fabrics seem pale and uninteresting. They just cannot deliver the zing that my home-produced, procion-dyed fabrics can.

The variety and intensity of the coloured fabrics you can produce are entirely under your control.

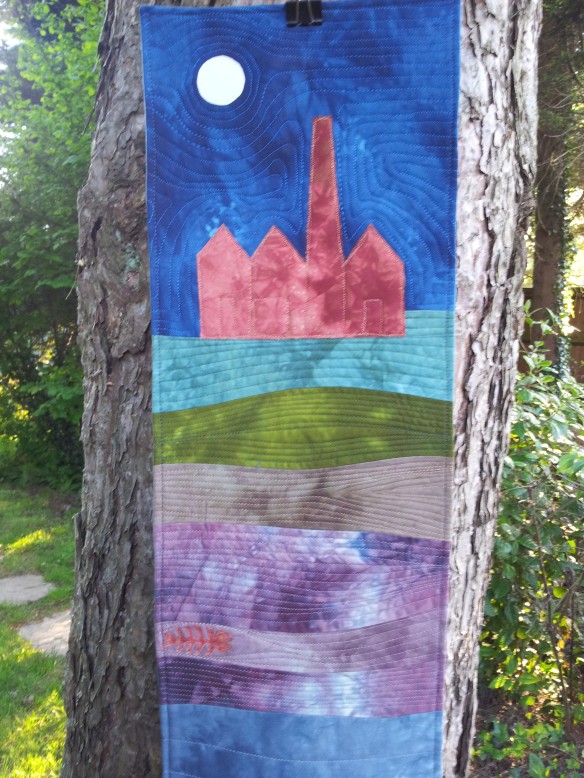
Wall hanging for the local Brickworks Museum shop

Wall hanging for the local Brickworks Museum shop

A Whole New World of Colour

When you visit a fabric shop, or even buy on-line, your choice is limited to whatever is on offer. But once you get the hang of dyeing, you can create whatever colour you want and even a good many that you didn’t want – at first…

One of the most exciting things about dyeing is the element of surprise. When you’re not in need of any particular colour and you just allow yourself to experiment, you will be amazed at what you can come up with. Some pieces you may not like at all, but you can change them. If you’re using a good quality fabric – and we’ll get to that in a minute – you can overdye any that are not quite your thing, until they’re just right.

A Safe and Easy Process

Dyeing is not difficult. There are chemicals involved, and a fair amount of mess, but with a bit of care and attention to detail, home dyeing is easily achievable by almost anyone. Very little specialist equipment is required and you probably have most of the general equipment already. Anything you don’t have can usually be picked up cheaply at a supermarket or discount store.

Economy

Commercially-dyed and printed fabrics are expensive and, as long as labour prices in the Far East continue to rise, the price will keep on rising. High quality mercerized cotton fabric, ready prepared for dyeing and printing (PFD), if you buy it in lengths of at least 10 yards (or metres), can work out at less than half the price, per metre, than commercial fabrics. And it is usually 60” wide; instead of the traditional 45” width of those you buy.

I buy my dyeing fabric, in 60m bolts, from a former mill town in the North of England. I am not under any misapprehension that it is woven there any longer, but it is heartening to be able to buy it in the same country!

Initial outlay for dyes and chemicals, can be quite expensive, but you need only three basic primary colours to begin with, and black. I say begin with, but I have been dyeing for over five years now and still only buy basic primaries and black. I may buy a different shade of primary occasionally to mix things up a bit, but I still prefer to experiment with mixing my own colours rather than buy ready-mixed.

The Procion dyes I buy are very economical and a little goes a long way, as you will find when you start to clean up after a dye session.

All the other equipment you will need is cheap and readily available, if indeed, you don’t have it already.

So give dyeing a go – you’ll love it!

This post is an excerpt from my new eBook ‘How to Dye Your Own Fabric’. If you’d like to get the book for yourself I’ve given you the link below:


How to Dye Your Own Fabric – Types of Fabric

Fabrics for Dyeing

The success or failure of any dyeing project depends largely on the fabric you choose. Fabrics come in a huge range of weights, constructions and compositions and it is very important to choose one which will give the best possible results for your project. Not only will this prevent you having to go back and repeat the whole process again but it will be a huge boost to your confidence in your ability to dye your own fabrics.

Fabric Construction

First, let’s talk a little about how fabrics are constructed and why some are suitable for dyeing and some aren’t.

Fabric generally falls into three types: woven. non-woven and knit.

Woven Fabrics

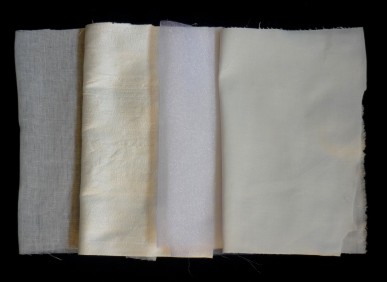
Woven fabric is the most commonly used for home dyeing. It is formed from two sets of threads, the warp, which runs lengthwise, and the weft, which runs widthways. Woven fabrics are available in simple or complex weaves. Simple weaves can be muslin, denim and some types of sheeting while complex weaves can be corduroy or towelling.

Examples of Woven Fabrics

Examples of Woven Fabrics

Non-Woven Fabrics

Non-woven fabric is generally defined as a set of threads or filaments which are entangled, by some mechanical means, and then bonded thermally or chemically. They are commonly made with by-products from the plastics and oil and petrochemical industries and are used for making very specific products. These can include single use, bacteria-resistant products for hospitals and schools, tea-bags and packaging. Non-woven fabric can be made with some recycled materials and does not require the raw materials to be turned into yarn before construction, so it considered to be quite ecologically friendly – but not great for dyeing.

Knit Fabrics

Knit fabrics can be divided into two types, warp knits such as tricot, which are generally used for t-shirts, and weft knits, which are generally hand or machine-knitted. The main difference between the two is that weft knits unravel when cut but warp knits, while they may fray a little, don’t unravel.

Examples of hand-knitted fabrics

Examples of hand-knitted fabrics

Knit fabrics can be dyed providing they are made from plant-based fibre such as cotton, rayon or hemp, or protein fibres such as wool, alpaca or mohair.

Get the Book

This post is taken from my new eBook ‘How to Dye Your Own Fabric’. If you’d like to get the book for yourself I’ve given you the link below:

How to Dye Your Own Fabric

An exciting piece of news! My fourth and latest eBook ‘How to Dye Your Own Fabric’ has just gone live and is now available on Amazon. If, like me, you love fabrics and textile arts, you will have probably had trouble, at one time or another, finding just the colour you want.

Dye example

If you live on the South Coast of the UK, as I do, you will probably have had more trouble than most as we are not well-served with good fabric shops.

n688363607_1444685_7919911.jpg

I solved this annoying dilemma by learning to dye my own fabrics and have bought very few commercial ones since. Dyeing at home is great fun and the wealth of colours you can produce with just three primaries is amazing.

dye close up

I’ve put all my experiences in my latest book ‘How to Dye Your Own Fabric’. I’ll be sharing some of my tips and recipes in future blogs but if you’d like to get the book for yourself, I’ve given you the link below.


How to Get Started in Machine Embroidery – What threads to Use

On some of the sewing and embroidery pages I follow, there have recently been questions and comments on the best thread to use for machine embroidery.

Those of us who sew a lot probably have lots of conflicting opinions on this but, just for the record – here’s mine!

The Importance of Good Thread

Thread is very important. It’s particularly important in free-machine embroidery. When you’re moving that fast, and once you get the hang of it you will be going pretty fast, the thread will reeling out very quickly and the least little problem with the thread, is going to cause it to break. And that’s a real pain. So if you’re going to buy thread for machine embroidery, make sure it’s the best you can afford.

Use Good Threads

Use Good Threads

What Not to Use

Your Sewing Box Inheritance

Lots of us have been left sewing boxes by aunties or grandmas. We have become known as the stitcher in the family and they very kindly leave us their sewing box. It’s usually quite old, lots of reels of threads, bits and pieces, some useful, some not so. The trouble is with old threads is they tend to become flattened on the reel and, if you use them on your machine, they’re not going to run very smoothly. The quality is not going to match that of modern threads and they are likely to snap. So I would suggest that you keep these old threads for hand sewing. As you can imagine, I’ve upset a few people by telling them this. Being left something as personal as a sewing box can be very meaningful and hold lots of memories but, unlike antique furniture, wine and paintings, thread does not improve with age. So be kind to yourself and your machine and use a good modern thread.

Threads from Auction Sites

You’ve probably been on some popular auction sites and seen machine embroidery ‘silk’ from Thailand or somewhere in the Far East. It’s usually very cheap. But there’s a reason for that. I’ve tried them myself, from several different vendors, but at anything other than a snail’s pace, they snap, shred and leave you thoroughly fed up. It’s really not worth it, save yourself the pain and get something decent.

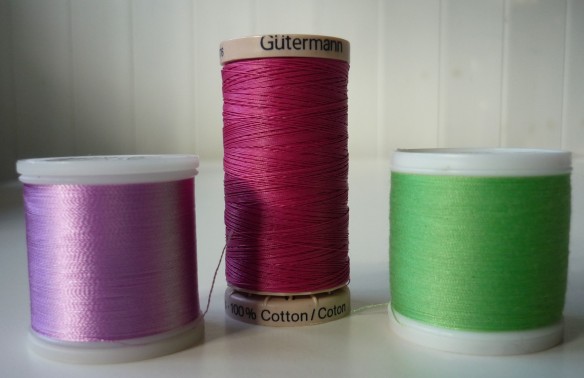
three threads

Bargain Basement

Buying bargain threads from markets, car boot sales, the post office (unless it is also a haberdashery as my local one is) or the corner shop is also a potential road to disaster. Remember at all times, they’re cheap for a reason. And the way to tell if a thread is really no good is to unwind a short length from the reel, hold it up to the light and, if it’s a bit fluffy or hairy, reject it as that fluff is going to clog up your needle and ultimately, your machine.

Types of Threads

Threads are gauged generally by their thickness. Some manufacturers (I use Madeira but there are many other good brands) indicate thickness by numbers. The higher the number – the thinner the thread. The profile of the thread is also important. Now the profile of a thread can be seen if you snip a bit off the end and look at the thread end on. Standard all purpose polyester threads have a round profile. They generally have a have a dull appearance, on the reel, as when light hits them it is scattered in all directions and very little is reflected back to your eye. Rayon machine embroidery thread has a flat profile and so reflects a lot of light back to your eye, making it look shiny.
Obviously even the best threads will shred or snap occasionally but you can lessen the chances of that happening by buying something good.

So What Threads Do I Recommend?

All I ever use is three types:
• a standard all purpose polyester for general sewing and for bobbin filling when machine embroidering.
• a good quality rayon thread for embroidery.
• a 100% cotton quilting thread for embroidering on quilts and throws.

This is an excerpt from my craft eBook ‘How to Make a Living From Crafts’. If you’re interested in getting the whole book, here’s the link:

Revisiting The Secret (or Not so Secret) Photo

This is not, strictly speaking, a new post.

Just lately some of the embroidery and sewing pages that I follow have had a few requests asking for help in printing photos on fabric for memory quilts.

So I thought it might be helpful to drag out this old post and update it in the hope that it might be of some help.

Hope it’s of use, but if you have any questions, please don’t hesitate to ask.

We crafters are a savvy and often financially-challenged bunch and usually like to tackle things in the most cost effective way possible – even if it does mean a lot of hard, time-consuming work. So it is with printing photos on fabric.

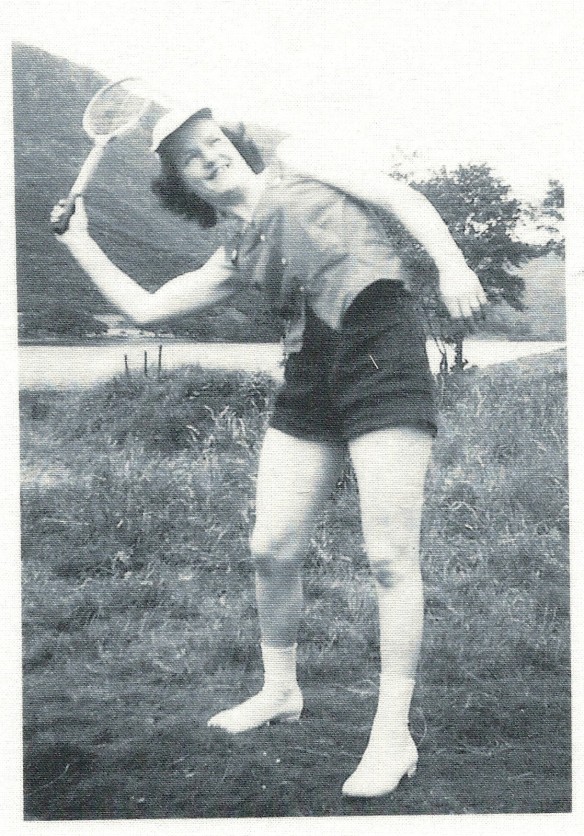
A Photo of my Mum in the 50s Printed onto Fabric

I particularly like old black and white photos printed onto fabric. The texture of the fabric emphasises the graininess of the photo and adds a wonderful sense of antiquity.
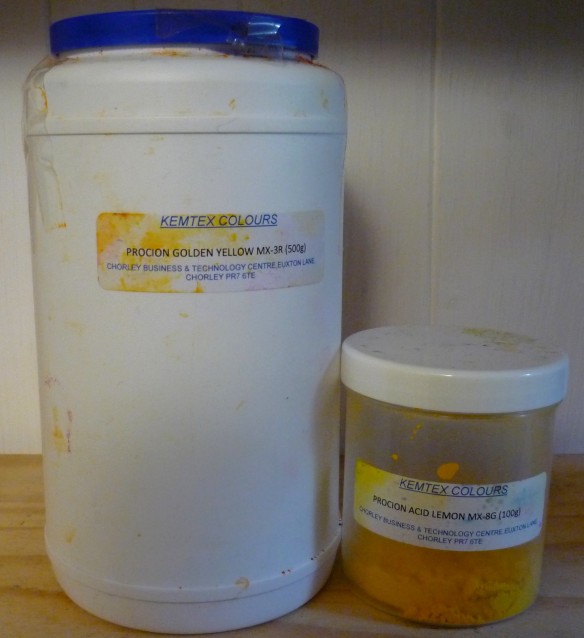
A Photo Quilt made by one of my Students

So here’s how to do it.

For a good image you need a good tight weave fabric. I use a pre-shrunk mercerised cotton that has been prepared for dyeing and printing – that means any sizing or dressing has been washed out.
I then cut out however many pieces I need a little larger than A4 (8 1/4″ x 11 3/4″), to allow for any further shrinkage and to allow you to trim the pieces cleanly before printing. I find 9″ x 12 1/2″ is adequate.

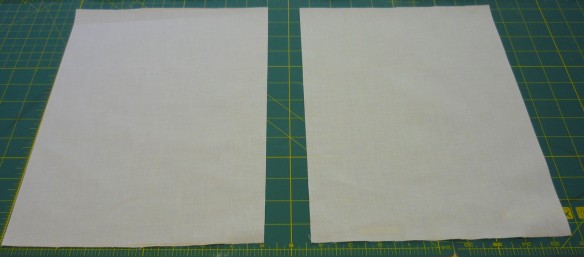
Cutting the Fabric

The next stage is to soak your fabric to prevent the photo from fading. Now I used to use Bubble-jet Set for this, but it is rather expensive for a bit of formaldehyde and water and doesn’t go very far. So a short trawl on the internet revealed a marvellous recipe for home-made photo set.

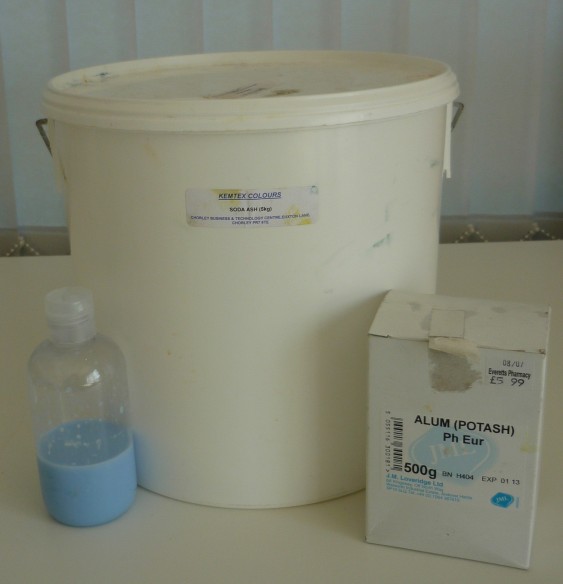
You will need:

  • 2 1/2 cups of hot water (not boiling but quite hot)
  • 2 1/2 oz of Alum (potash) – available from chemists in the UK and, I’ve been told, drugstores in the US.
  • 2 x tablespoons Soda ash or washing soda – available from supermarkets or hardware stores
  • 1 x teaspoon of fabric conditioner

Dry Ingredients for Home Made Photo Set

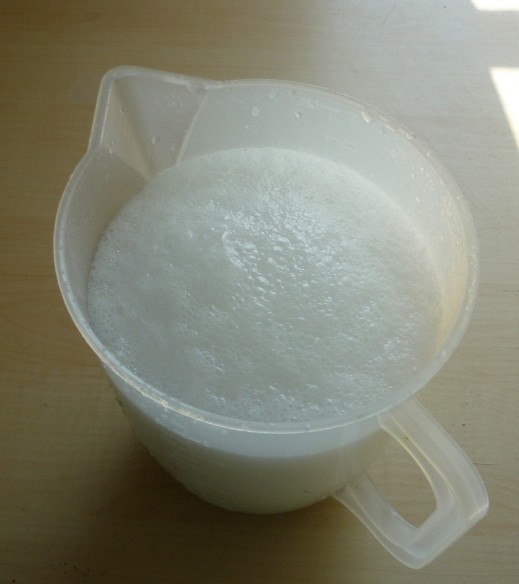
Add the dry ingredients to the water in a large jug or bowl (at least twice the size of the amount of water) and stir until the alum crystals dissolve. It will bubble up but fear not, the bubbles will subside after a few minutes.

Photo Set Bubbles

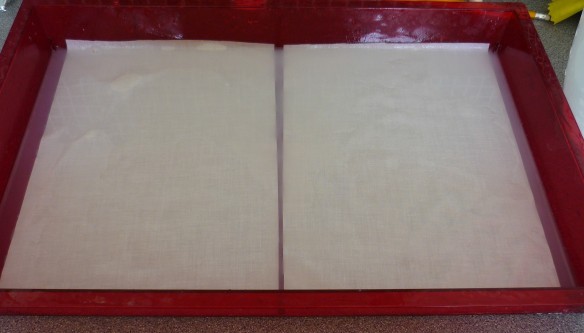
For the next part, ideally, you will need a large flat tray, about 3-4″ deep, but if you’re only doing a few pieces, a washing-up bowl will do.

Pour the photo set into the tray and check there are no undissolved alum crystals (if there are just pour back into the jug and stir a bit longer).

Lay your fabrics in the tray and press to submerge – you should wear rubber gloves for this.

Soaking the Photo Fabric

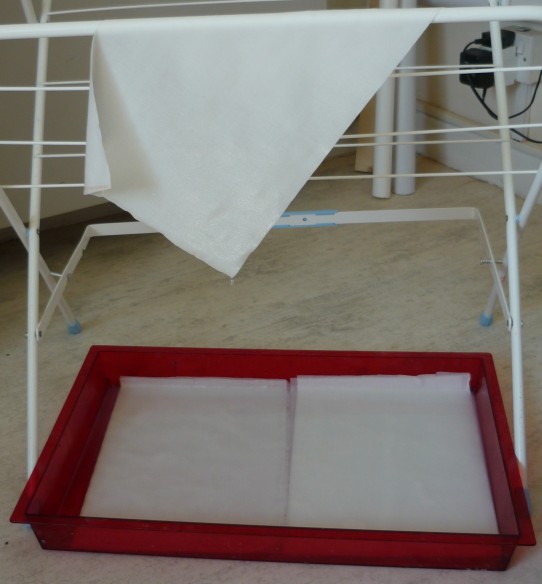
Leave the fabric for 5 minutes. then place the tray under a clothes line or clothes horse and lift each piece out one at a time and hang at an angle to drain for a minute or so.

Then hang all pieces up to dry overnight – leaving the tray in place to catch any drips of your carefully prepared photo set!

The next day, decant the photo set into a sealable bottle and store in a cool place to re-use for the next project.

Cut some sheets of freezer paper (this, I’m told is readily available in retail outlets in the US but is not so easy to find in the UK being deemed more a craft than a kitchen item – I, of course get in on the internet…), the same size as your soaked fabric and iron them onto the back of the fabric.
Now lay these pieces face down either under a large cutting mat or between the pages of a large book until completely flat. If you try and put them through the printer curled up, you are asking for a smeary paper jam.
When flat, usually the next day, place a piece of A4 paper (or whatever size you want to print) on top of each fabric/freezer paper combo and trim carefully to the exact size. Ensure there are no loose threads or frayed edges.

The next bit depends on your printer. I use an HP and it gives me the option to choose ‘other speciality papers’ in the paper option menu which works fine. I always print on ‘Normal’ quality rather than ‘Best’ as it gives the best image.

Only place one piece of fabric in the printer feed tray at a time.

While printing, keep a very close eye on the passage of the fabric as the corners do tend to flip up and get caught in the roller resulting in a smeared image.

Of course, the alternative is to go out and spend good money on  a pack of those ready soaked and backed printer fabric sheets – but where’s the fun in that?

How to Get Started in Machine Embroidery – Getting Wound up

In a recent post I talked about the best type of bobbin arrangement for machine embroidery. Today, I’d like to talk about the bobbins themselves.

Getting Wound Up

The thing about bobbins is that they must be correctly wound. A bobbin that is not correctly wound will cause you no end of problems.

So how can you tell whether it’s wound correctly?

First of all you will have read your sewing machine instruction manual to make sure that you’ve threaded it right for bobbin winding. You must wind enough thread onto the bobbin; too little and the wind will be too loose causing slippage on the reel and a poor stitch construction, too much and the bobbin will not run freely in the case causing tension problems.

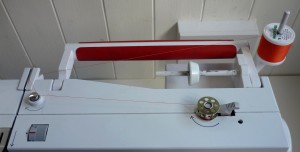
Bobbin winding on a Bernina 230

Bobbin winding on a Bernina 230

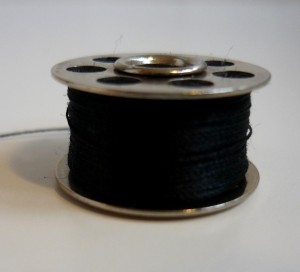
So how do you know its wound properly? The depth of the thread should be even from the top to the bottom of the bobbin and not bunched up at either extremity. There should be no ends or loops of threads poking out and it should look completely smooth. If that’s the way yours looks, you’re doing it right.

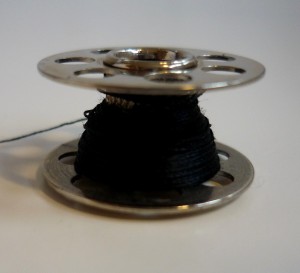
Correctly Wound Bobbin

Correctly Wound Bobbin

But if it looks like the one below, there is something wrong.

Incorrectly Wound Bobbin

Incorrectly Wound Bobbin

If your bobbin doesn’t look quite right, don’t just tell yourself ‘It’ll be OK’, because it won’t. You’ll suffer thread breakages, you’ll risk a bird’s nest of threads under your needle plate and it will all be a pain and may put you off before you’ve even got started. It really is worth getting this bit right.

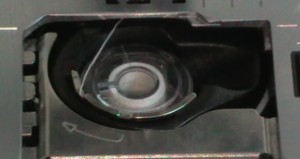
The other really important thing is, and this causes a myriad of problems, is bobbin threading. Now in most drop-in bobbin machines, the threading is similar, it’s easy to do and there are even a few little arrows to help you. Some even cut the thread off for you and automatically bring it to the top of the needle bed when you start sewing. But you must make sure that the bobbin is in the right way round or there will be no tension on the bobbin thread. This may cause poor stitch construction and thread or even needle breakage. Take time to check.

Fixed drop-in Bobbin Threading

Fixed drop-in Bobbin Threading

The same is true of vertically mounted bobbins, they must be properly threaded. There are no arrows to help you here but it will all be in your instruction manual. Please take time to check.

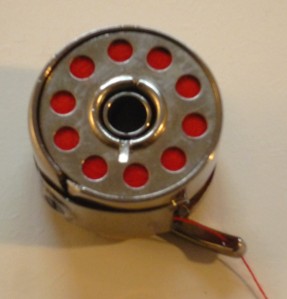
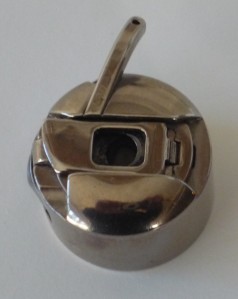
Bobbin Case from front

Bobbin Case from front

On a final note, if you have one of the bobbin cases that has a separate little lug specifically for free-machine embroidery, please use it, despite its small and insignificant appearance, it will make a huge difference to your bobbin tension.

Bobbin Case with Lug Threaded for Machine Embroidery

Bobbin Case with Lug Threaded for Machine Embroidery

This post is an excerpt from my craft eBook ‘How to Get Started in Free Machine Embroidery’ If your interested in getting a copy, here’s the link:

How to Get Started in Free-Machine Embroidery – Laundry Bag Project

In this post I’d like to share one of my favorite projects with you – a stylish and useful laundry bag. This project is great for practicing applique and free machine embroidery and, if you customize it with your family’s names – you might even get them to put their laundry in it!

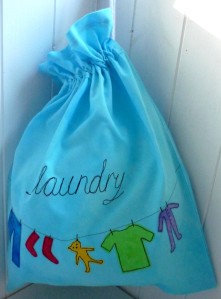
Laundry bag1

Make this fun laundry bag in any colour or size you want. If you want to make one for everyone in the family, why not personalise it with their names?

Washday Laundry Bag

 You Will Need

1/2m strong cotton fabric

Fabric scraps for washing appliqué

Fusible web for washing appliqué

Machine embroidery and polyester thread in black

2m cotton cord

Embroidery hoop

Hand-Dyed Fabrics

A range of hand-dyed cotton fabrics are available from www.time4me-workshops.co.uk/shop.

Machine Setup

All seam allowances are 1/2” (1.25 cm) unless stated otherwise.

A 2.5mm stitch length is used throughout except for the addition of appliqué images.

A standard zigzag foot is used throughout unless otherwise stated.

To Make Your Laundry Bag

Cut Your Pattern Pieces

1        From the cotton fabric, cut 2 x rectangles 19” (48cm) x 16” (41cm).

2       From the remaining cotton fabric, cut 2 x strips 2” x 20”.

Appliqué your Front Panel

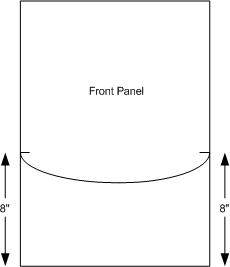
3       Choose one of the rectangles to be the front panel and lay it on a flat surface with one of the shortest edges at the bottom.

4       Measure 8” from the bottom edge of each long (19”) side and mark these points.

Marking position of washing line

5       Using a dressmaker’s curve or curved ruler and some tailor’s chalk, draw a curved line between these points. This will be the position of the washing line.

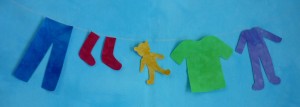
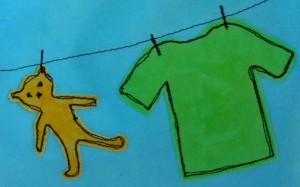
6       On the paper side of your fusible web, draw an assortment of clothing or soft toys you might find on your washing line. These do not have to be artistically correct – have fun!

7        Roughly cut out each shape.

Note: If the recipient has a favorite toy, pyjamas or t-shirt, you could make one, or two, of the pieces a similar shape and color.

8       Choose the colors of your washing items from your fabric scraps and iron each piece.

9       Referring to the instructions for the brand of fusible web you are using, fuse each clothing shape onto the wrong side of your chosen fabrics and carefully cut out.

10   Arrange your washing with the top edges just slightly below the curved line until you are happy with it.

Placing washing items on line

11     Fuse in place.

12    Refer to your machine instruction manual and set your machine up for machine embroidery, fit an embroidery or darning foot and thread the top with black embroidery thread and the bobbin with black polyester thread.

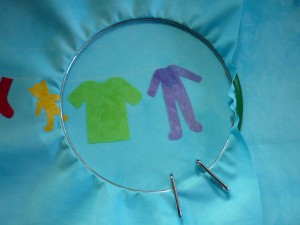
13    Hoop your fabric, so a number of complete washing items are encircled (this will depend on the size of your hoop). Ensure your appliqué is on the recessed side of the hoop.

Hooping the washing items ready to embroider

14   Embroider around each article of clothing, adding details as required.

Embroidering washing items

15    Add pegs to each clothing item or toy.

16   Refer to your instruction manual and set your sewing machine for normal stitching. Fit a standard straight stitch/zigzag foot to your machine and using a 3mm length straight stitch, stitch several times over the line marked earlier for the position of the washing line.

Add your Writing

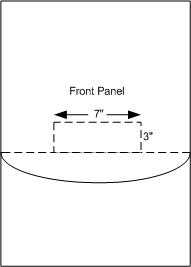
17    Using a ruler and tailor’s chalk, draw a straight line connecting the two ends of the washing line.

18   Mark the central point of the line and from this point, draw a box 7” x 3”, so the bottom 7” edge of the box rests on the line. Your embroidered word, whatever you have chosen, should fit inside this box, but if you are using a longer name or several words you may need to increase the size of the box accordingly (and the size of your hoop!).

Marking position of writing box on laundry bag

19   Now, on a sheet of paper, draw out the 7” x 3” box and write the word you are intending to embroider inside in a neat copperplate. Try to ensure there is an equal amount of space above and below the word.

20  Once you are happy with your word, trace over it a number of times with your finger as described in the previous section.

21    Place your front panel in the hoop, centralising the box as accurately as possible.

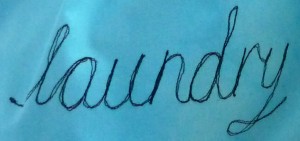
22   Set your machine for free machine embroidery as before, and embroider your word. Don’t worry if you go off a little here and there, this will only add a little homemade charm!

Embroidered Laundry bag word

Assemble your Laundry Bag

23   Place the bag front and back panels right sides together and pin round the two sides and the bottom.

24  Set your sewing machine for a 2.5mm straight stitch and stitch round the three sides.

25   Diagonally clip the two bottom corners.

26  Press open the side seams.

27   Turn over ¼” all round the top of the bag and press.

28  Turn over another ¾” and press again.

29  Place some pins at 90 degrees around the top of the bag and stitch close to the lower fold. Turn the bag right way out, pushing out the corners.

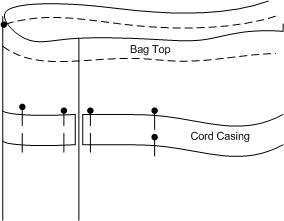
30  Now stitch together the two 2” strips along one of their short ends and press the seam open. Trim the length of the strip to 32”. This strip will be your cord casing.

31    Turn in ½” on each short edge of the strip and press.

32   Turn in ¼” on each long edge of the strip and press.

33   Using tailor’s chalk, mark a line 2” below the top edge, all the way round the bag.

34  Starting at the right hand side seam (with the front panel facing you) pin the pressed strip, with the raw edges facing the bag, all round the bag, finishing back at the side seam. Try and place the seam, in the pressed strip, at the rear of the bag.

Placing of cord casing on laundry bag

35   Stitch all round both long edges of the cord casing about 1/8” from the edge, working a few reverse stitches at the beginning and end of each seam to secure.

36  Apply a piece of sticky tape to each end of your cotton cord to prevent fraying while threading it through the casing.

37   Using a large safety pin, fastened to one end of the cord, thread it through the casing and knot the ends together securely. Remove the tape as fraying is limited by the position of the knot.

The bag looks better filled, so get your family to fill it with their laundry!

This project is from my eBook ‘How to Get Started in Machine Embroidery’. If you’d like to buy the book, which has all the instructions you’ll ever need for free machine embroidery as well as more projects and ideas, Here’s the link: